Getting Started
Set up your workspace, add your first customer, and organize your first project in Agiled.
Welcome to Agiled. Start with one customer and one piece of work. This guide walks you through setting up your workspace, adding that customer, and creating a project with a clear next task. You can add billing, booking, and automation as you need them.
Already joined a teammate's workspace? Follow Accept an invitation, check the workspace name, then skip to your first project. Ask your workspace owner which project to use before creating a new one.
1. Create your workspace
Create your account, verify your email, and follow the guided setup. Have your business name and preferred workspace URL ready. If you have a business website, you can use it to help Agiled suggest setup details. You can also skip website discovery and enter the details yourself.
A workspace holds your business records, settings, and team. If you belong to more than one, check the workspace switcher before adding customer data.
Review any forms, services, templates, or workflows created during setup before using them with customers. When setup finishes, you arrive at the dashboard.
You're ready to continue when you can open the dashboard in the right workspace.
2. Set the essentials
Open Settings and check your business name, region, and currency. Add your logo and business address before sending customer-facing documents. The business profile guide links to the individual settings pages.
In Settings > Modules, enable CRM and Productivity for this walkthrough. Keep the other modules you already need; you can return here to enable more later.
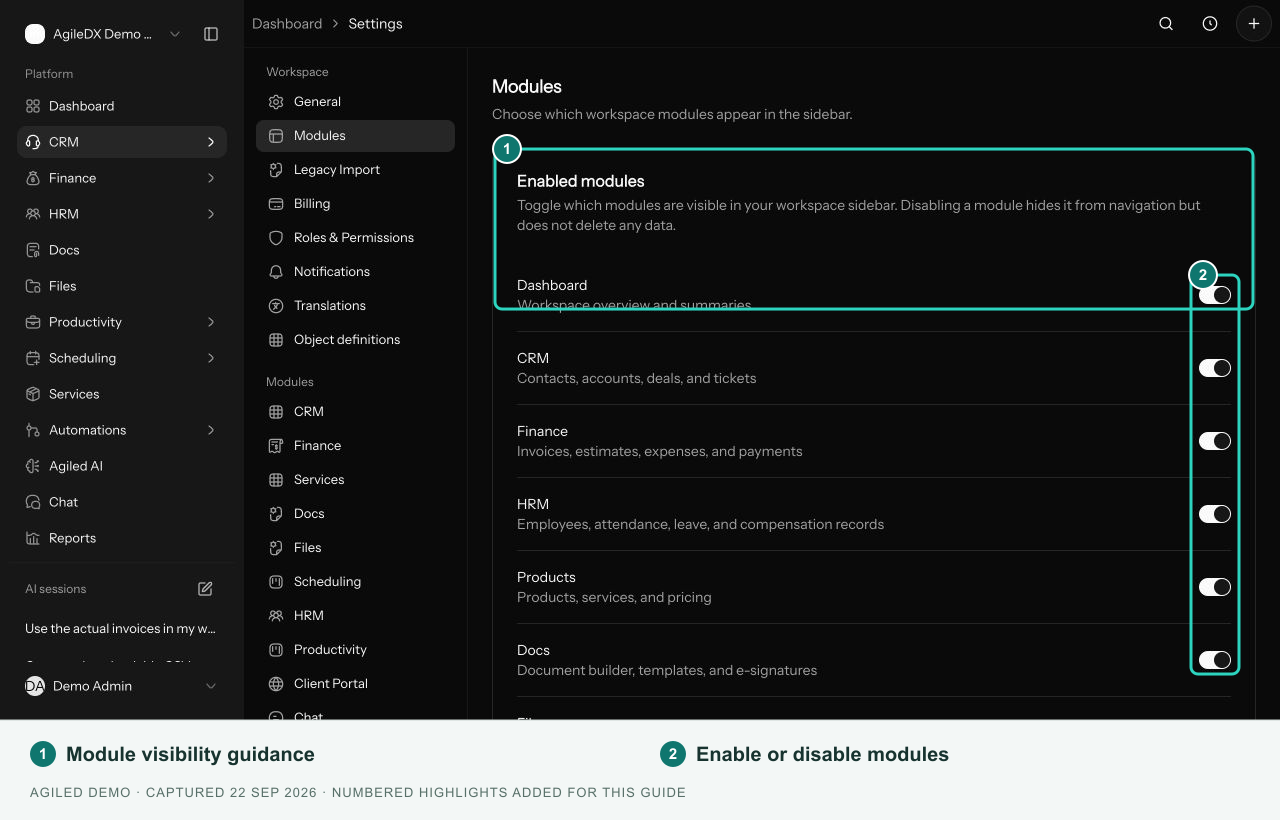
Modules make areas of Agiled available to the workspace. Your role controls what you can do inside them. If you cannot see a module or change settings, ask an owner or admin to check modules and your access.
You can complete this walkthrough without importing a spreadsheet or connecting an email, calendar, or payment provider.
3. Add your first customer
In Agiled, a contact is a person and an account is a company or organization. For example, Alex is a contact at the account Northstar Studio. You can keep a contact without an account when no company relationship is needed.
- Open CRM > Contacts and search for the person first.
- If they are new, select New Contact.
- Enter their first name and the email address you will use to contact them.
- Select or create their account if they belong to a company you want to track.
- Save, then open the contact to check the details.
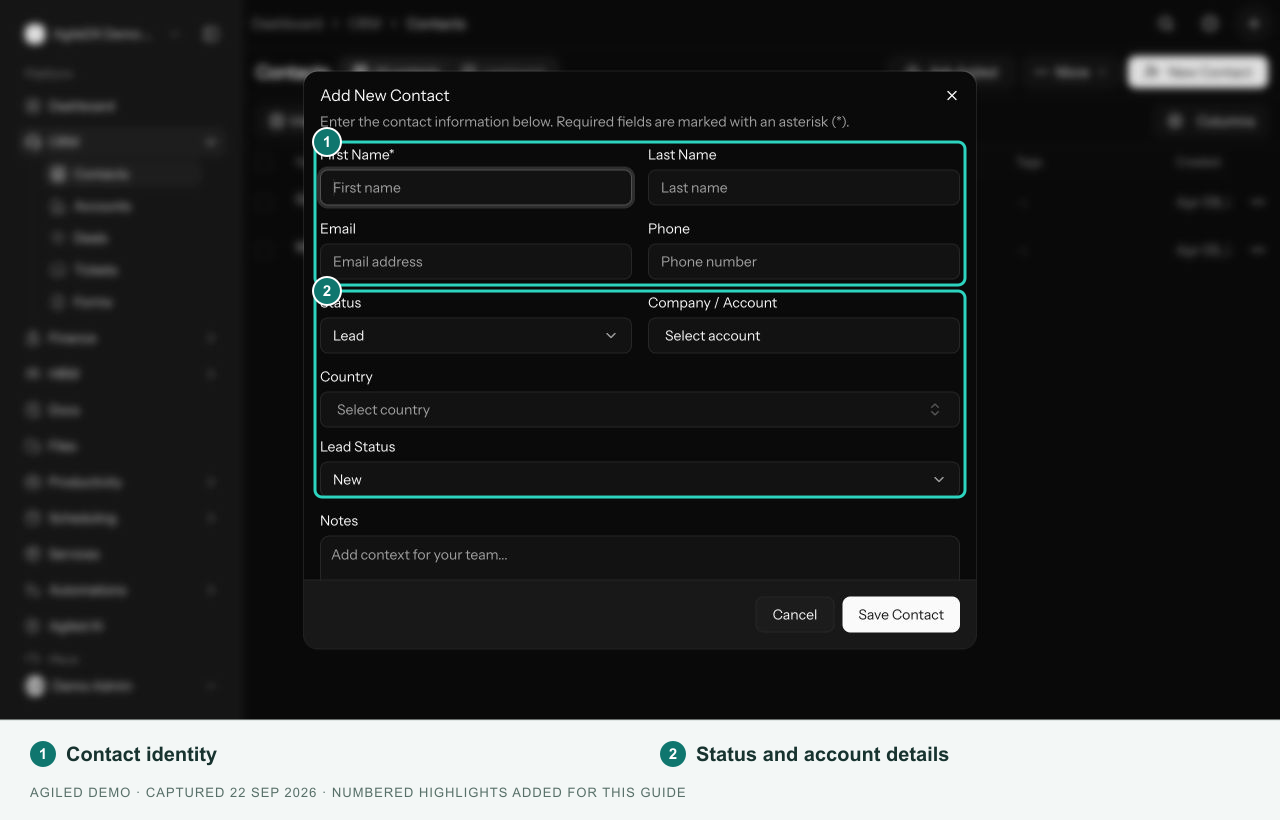
For a practice run, use a clearly named test contact and an email address you control. See Add contacts for optional fields such as tags, status, notes, and assignee.
You're ready to continue when the contact is saved and you can find it in CRM.
4. Create your first project and task
A project groups work for a customer or internal goal. A task describes one action someone needs to complete.
- Open Productivity > Projects and create a project.
- Give it a recognizable name, such as
Northstar Studio website. - Select the customer account or contact when the work belongs to a customer.
- Add the teammates who will work on it, or start with yourself.
- Save the project, then add a task such as
Prepare the kickoff agenda. - Assign the task to yourself and choose a due date. Add a short description explaining what needs to be ready.
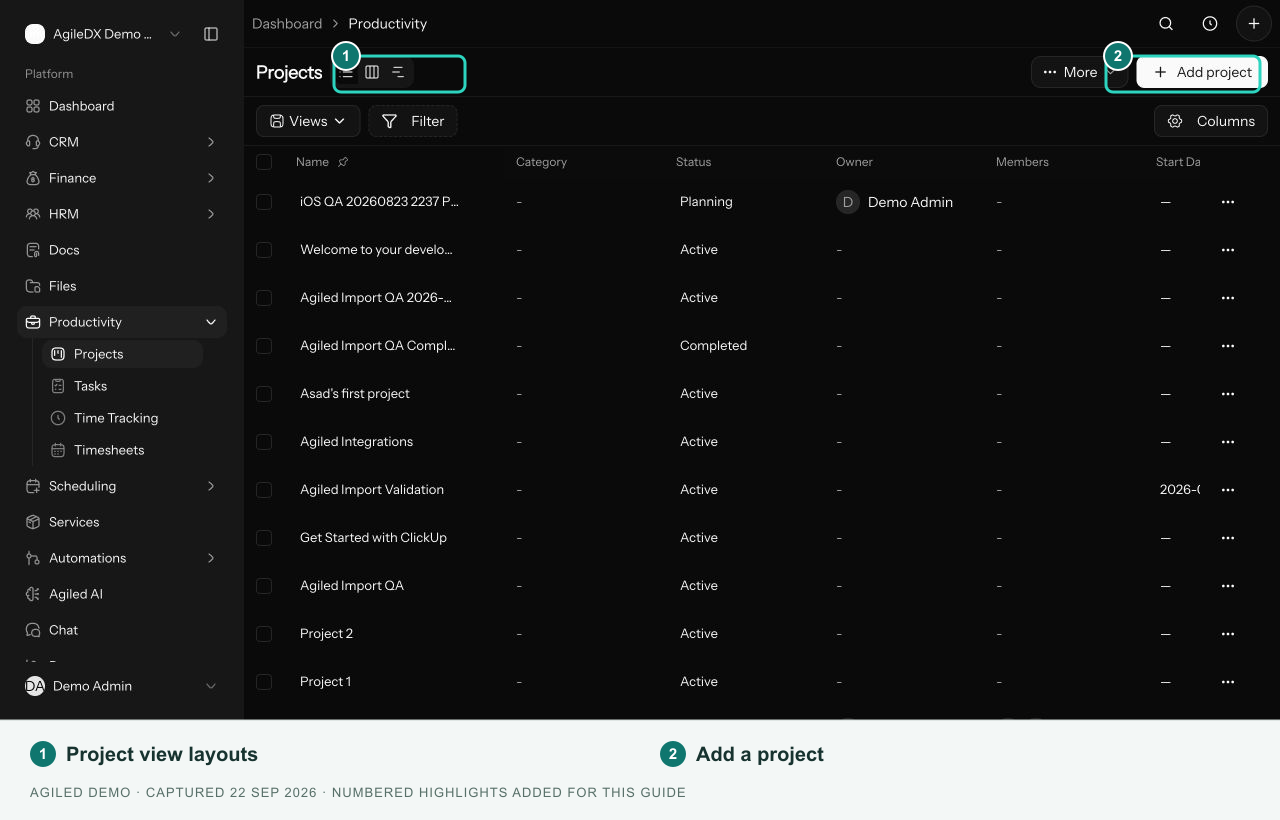
Open the saved task and confirm its project, assignee, and due date. If you only need a one-off reminder, create it directly in Productivity > Tasks. You do not need a project for every task.
The project guide and task guide cover files, views, time tracking, and other options when you need them.
Your first setup is complete when you can find your customer, open their project, and see who owns the next task and when it is due.
5. Choose your next step
Pick the outcome you need next. You do not need to complete every row.
| I want to... | Follow this guide | Prepare first |
|---|---|---|
| Bill a customer | Send your first invoice | Business details, currency, tax settings, and payment terms. Connect a payment gateway if you want online payment. |
| Let customers book time | Create a booking page | Your availability and calendar connection. |
| Send a proposal or contract | Send a document for signing | The recipient's email and reviewed document content. |
| Track sales opportunities | Set up a sales pipeline | The stages you use to move a lead toward a sale. |
| Work with my team | Invite teammates | Each person's work email and the role they need. |
| Move existing records into Agiled | Import existing data | A reviewed source file and a small first batch to check. |
Before sharing an invoice, booking page, form, or document, preview it and check the recipient details. Open public links in a private browser window to see what your customer sees. Send test messages only to an address you control.
Build on your first workflow
Once your team can complete its daily work, add reusable templates and the connections that save you time. Start with one process you already understand.
- Workflows run actions from triggers and conditions.
- Smart Flows guide customers through steps such as forms, scheduling, documents, and payments.
- Onboarding Flows give clients a guided path in their portal.
These are optional next steps. You can use contacts, projects, and tasks without setting up automation.
If you get stuck
| What happened? | What to check |
|---|---|
| I cannot sign in | Follow sign-in and password help. |
| My invitation does not open the right workspace | Confirm you are using the invited email address, then follow Accept an invitation. |
| I cannot see a module or create a record | Ask an owner to check that the module is enabled and your role allows the action. Availability can also depend on your plan. |
| I cannot find the record I created | Confirm the active workspace, search by name, and check the current list filters. |
Keep the first-day checklist open while you work through setup. For a broader setup tailored to your business, use the freelancer, agency, or service business guide.